1. Create a Menu Item
Click the “New menu” toolbar button:

The plugin will insert the new item below the currently selected item.
2. Choose the Target Page
The “Target page” setting determines what will happen when the user clicks the menu. There are four main options:
Link to an Existing Admin Page
This essentially makes the menu a copy of another menu item.
You can have as many copies as you want, but watch out for permission conflicts and duplicate URLs at the top level. When two menus have the same target page but different permissions – i.e. one is visible and the other is hidden, for the same role – you can end up in a situation where both items become inaccessible. If that happens, try checking/unchecking the items or using the “hide without preventing access” button.
Link to a Custom URL
Choose the < Custom URL > option from the target page dropdown, then enter a valid URL in the “URL” field. You can use both fully qualified URLs and relative URLs. Here are a few examples:
-
http://example.com/page.htmlhttps://example.org/abc/?parameter=value#anchor/wp-admin/options-general.php?page=menu_editor&sub_section=dashboard-widgets– a relative URL that points to the “Dashboard Widgets” tab of the menu editor.
You can use shortcodes in the URL. Admin Menu Editor Pro comes with a couple of built-in shortcodes. Shortcodes from other plugins can also work, but it varies by shortcode.
By default, clicking the menu item will open the specified URL in the current tab. You can make it open in a new tab or an <iframe> by changing the “Open in” setting under “show advanced options”. Note that some sites will prevent you from displaying their pages in a frame.
Embed a Post or Page
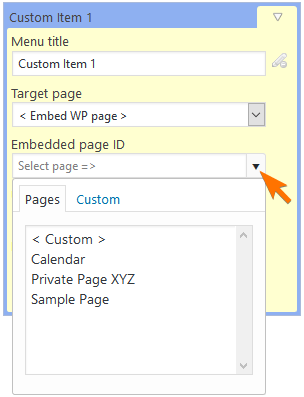
The < Embed WP page > option lets you embed an existing page, post or even a CPT item in the WordPress admin and make it look like it’s part of the dashboard. After you select this option, a new dropdown called “Embedded page ID” will show up. Open it and select one of the available pages from the list. If you want to embed a post or a different post type, switch to the “Custom” tab and enter the post ID manually.

When making the embedded page, you can use pretty much any HTML that works in a normal page. Just keep in mind that the WordPress admin usually has different CSS styles than the front-end theme, so some page elements might look different. Also, some shortcodes will not work in the admin.
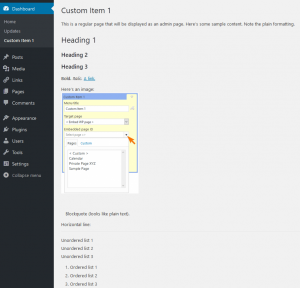
Here’s an example page that was created using this option (click for full size):
Make an Non-Clickable Menu (“None”)
Choose the < None > option to create a menu item that doesn’t link to anything and doesn’t react to clicks. This is intended as a way to help organise large menus. A non-clickable item can be used as a label, a separator or a section heading.
Tip: You can use the color settings under “show advanced options” to make non-clickable items easier to distinguish.
3. Set Permissions
Overall, permissions for custom menus work the same way they do for built-in menus and plugin menus: just select a role and check/uncheck the item. However, there are a couple of things to keep in mind:
- As a shortcut, you can select a role or a user before you create a menu item. The plugin will then automatically hide the new item from everyone except that role/user. You can adjust the permissions afterwards.
- When you create a new menu and use the “Custom URL” option to link to an admin page, any access restrictions that apply to that page will also apply the new menu. For example, lets say you set the URL to something like
https://example.com/wp-admin/options-general.php(i.e. Settings -> General) and you enable this menu for the “Author” role. Authors will be able to see this menu, but if they click it, they’ll get a “permission denied” error.
4. Adjust Other Settings
- Replace the automatically generated title.
- Change the icon.
- Change the page heading and window title (if using the “embed page” or “open in a frame” features).
- etc.
Notes
- To delete a menu item, click this button:

- It’s not possible to delete built-in menus or menus created by other plugins. If you need to get rid of them, try hiding them instead.
- Each top level menu must have a unique URL. If you need two items to link to the same page, try adding a meaningless query parameter to each of the URLs to make them unique. For example, instead of two links to
https://example.com/, usehttps://example.com/?abcd=987654andhttps://example.com/?abcd=123456. - When you use the “Custom URL” option and set it to open in an IFrame (“Open in”: “Frame” under “show advanced options”), you might sometimes get a blank page instead of the site that you expected. That usually means that the site in question intentionally prevents the browser from displaying it in a frame, probably as a security precaution. There’s no easy workaround unless you own the site.

